
Flatting
Once more, with clarity.

You’re absolutely right, I did a lousy job with that example in my last post. I replaced the art in the sample, but here is a complete article with those samples explaining in detail how flatting works.
The primary colorist (me) may do the flats themselves, use a computer program, or use a professional flatter.
I do all three depending on my needs.
The purpose of flatting is to create solid color areas that help me paint within the lines. Only rarely does a flatter make color choices. Flatting is a technical tool.
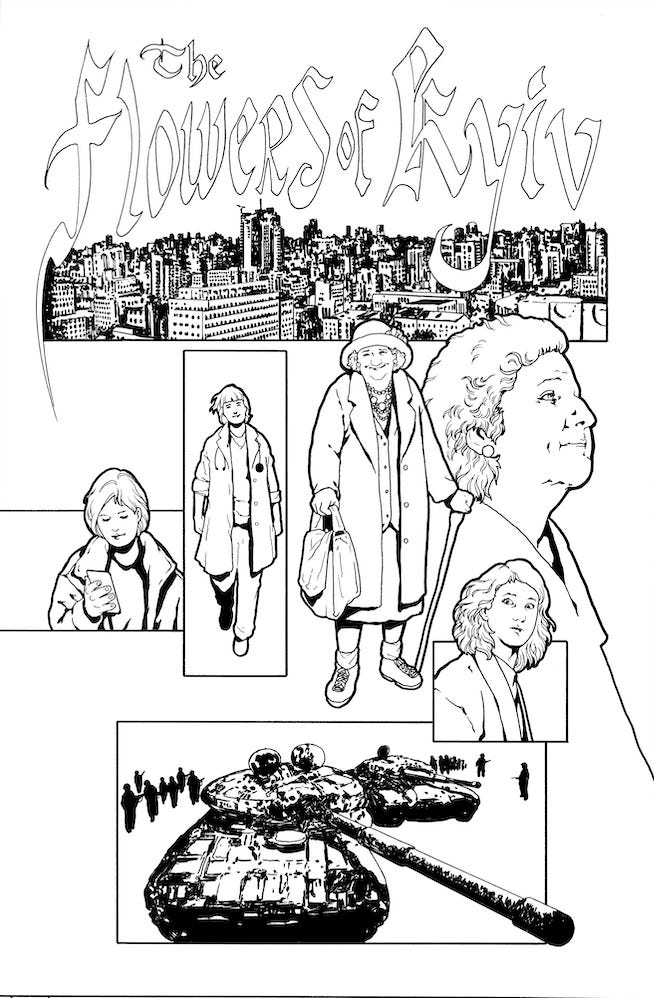
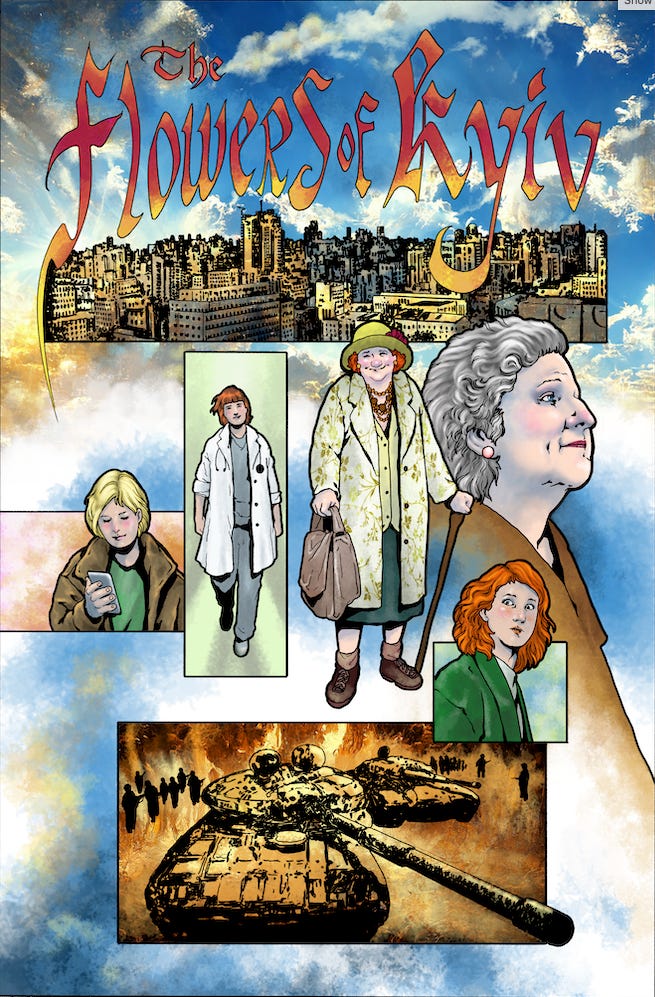
Here’s a look at my original black and white line art for the short story “Flowers of Kyiv”.
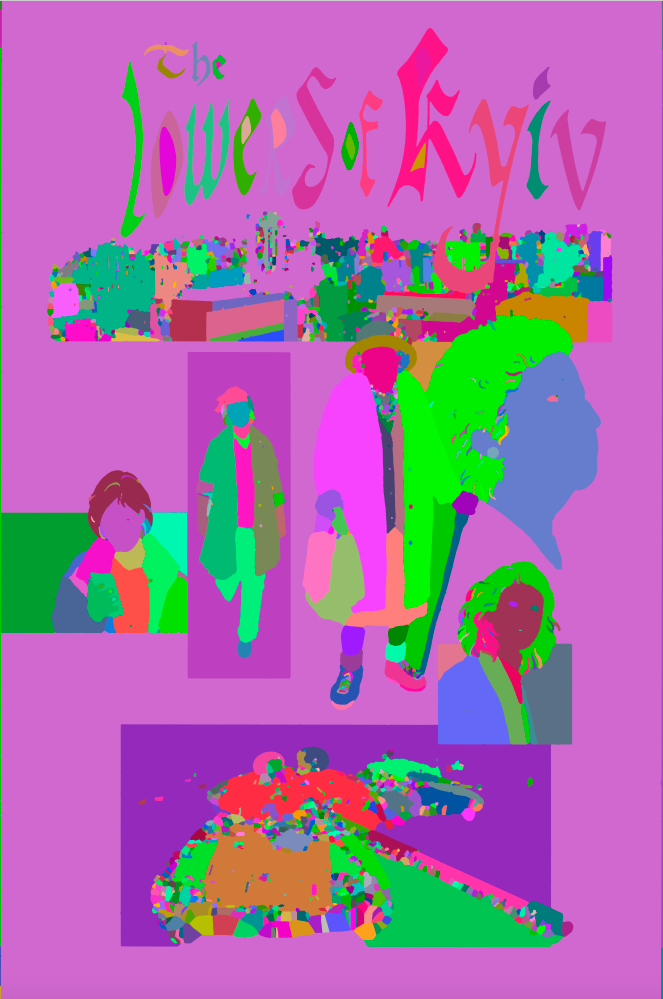
The computer flats using the Multi-fill/Flatten Pro plug-in for Photoshop.

Below, the same image with the top black line layer hidden. Note how all the color meets up under the black line art. THIS IS VERY IMPORTANT. If your flats don’t do this, you get a common issue in the final printed job called ghosting, a tiny white line around the black line areas of your art.
This is a problem for many people who are accustomed to creating webcomics. They use the paint bucket tool to fill in areas of color. This is fine for web, but in print, the ghosting becomes obvious. I advise anyone who is making any kind of comic to always make the digital files print ready.
What works on the web often doesn’t work in print. I had huge problems early on not knowing what this problem was, hiring people who didn’t know either, and then having to spend weeks redoing the digital files on an entire book.
That looks kind of cool, actually.
At this juncture, I turn it over to my flatter. In this case, Julmae Kristoff. And this is what I get back.
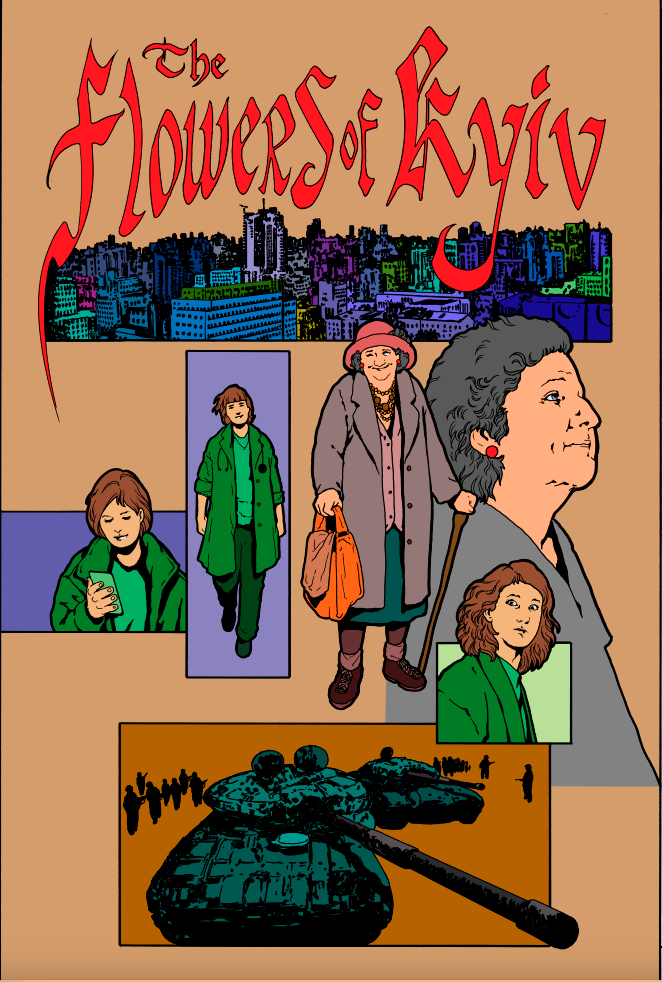
None of these are color choices I would make for myself, but they don’t have to be. They are there to speed up my coloring, to simplify areas, especially noodly bits like hair.
Below are the changes I made to the flats Julmae sent me.
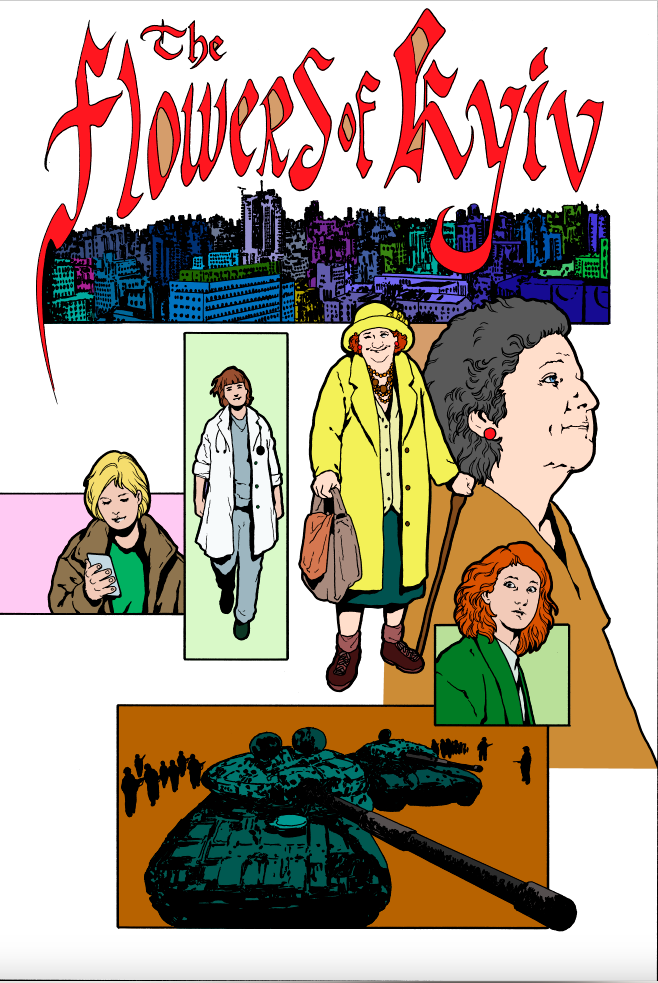
And here is my final color.
It may seem silly to source out flatting on something I can obviously do myself. But a professional flatter saves me at least an hour of technical work per page. Sometimes more. And they work faster than I can.
If I have the time, I do it all myself. If not, I hire Julmae for the basic step in the fourth picture.
Thank you! I didn't know anything about this process, so it is very interesting.
Thanks for the breakdown.
I was very confused by what you meant by "preliminary flats" and why you would need a flatter after that. I'm guessing using the plug-in reduces the cost of the flatter if they don't have to do the basic shapes themselves.
I tried one of those flatting plug-ins ages ago and it was unusable for my style. It was just a mess of little tiny flecks of colour that took me longer to select than just drawing the shapes in myself. Maybe they have improved or I just needed to dial in the settings better, but my inking style has too much banjo work I think. I do way too much feathering and hatching and random texture lines for it be able to pick shapes.
I can see how it would work with your linge-claire style.